#2377 TECHNIQUES: Diagonal Tiling by Lingming Tseng on Facebook
- Alex Johnson
- May 1, 2024
- 1 min read
Alt text / image descriptions are available for the images in this post.
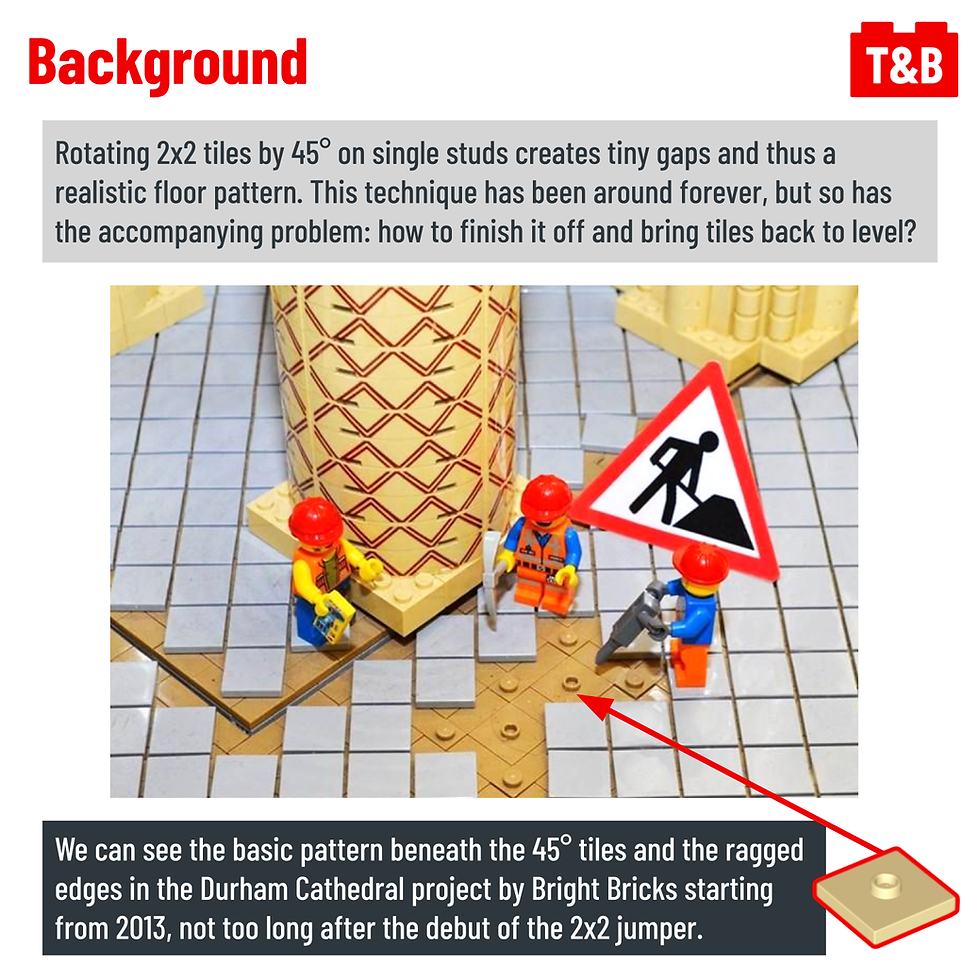
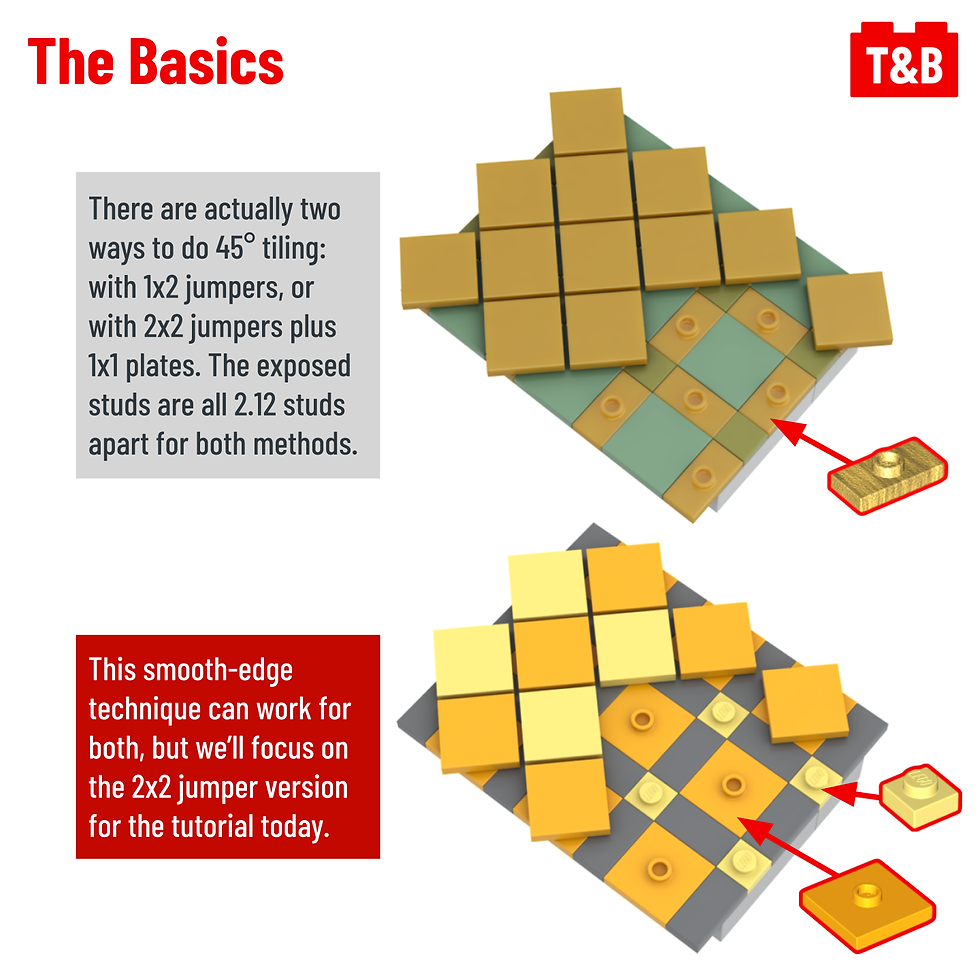
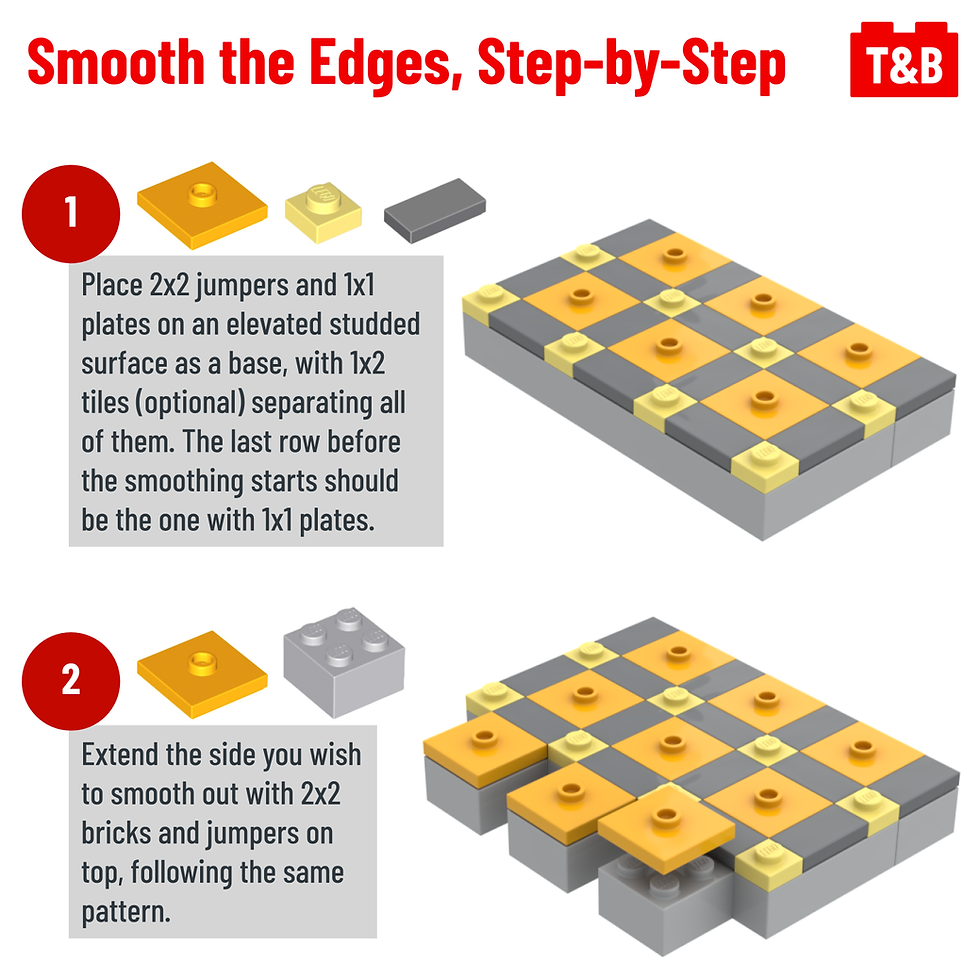
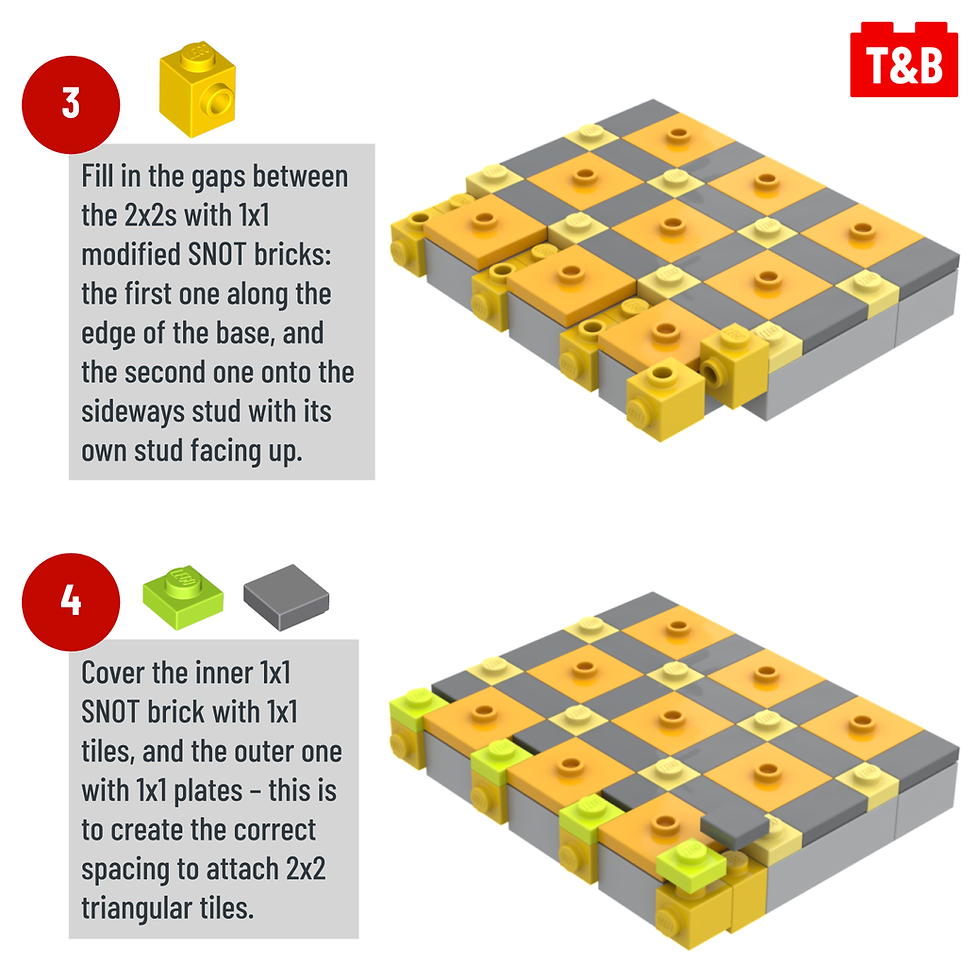
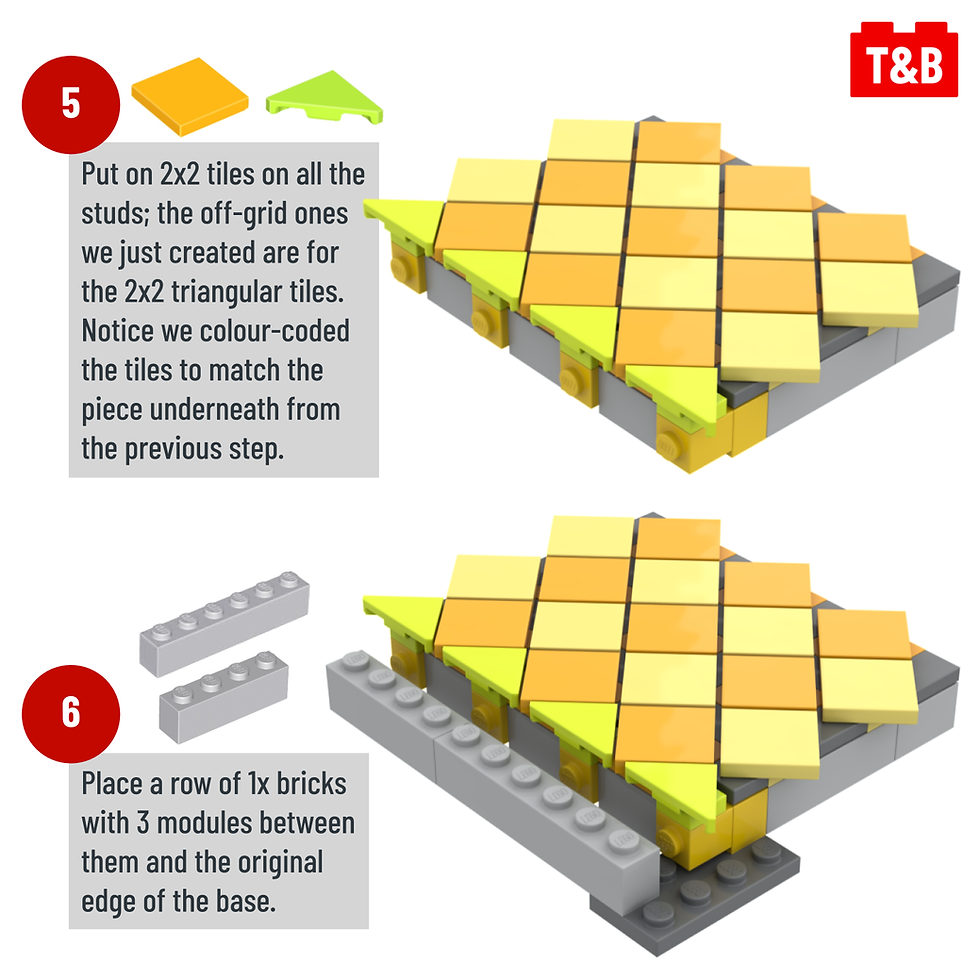
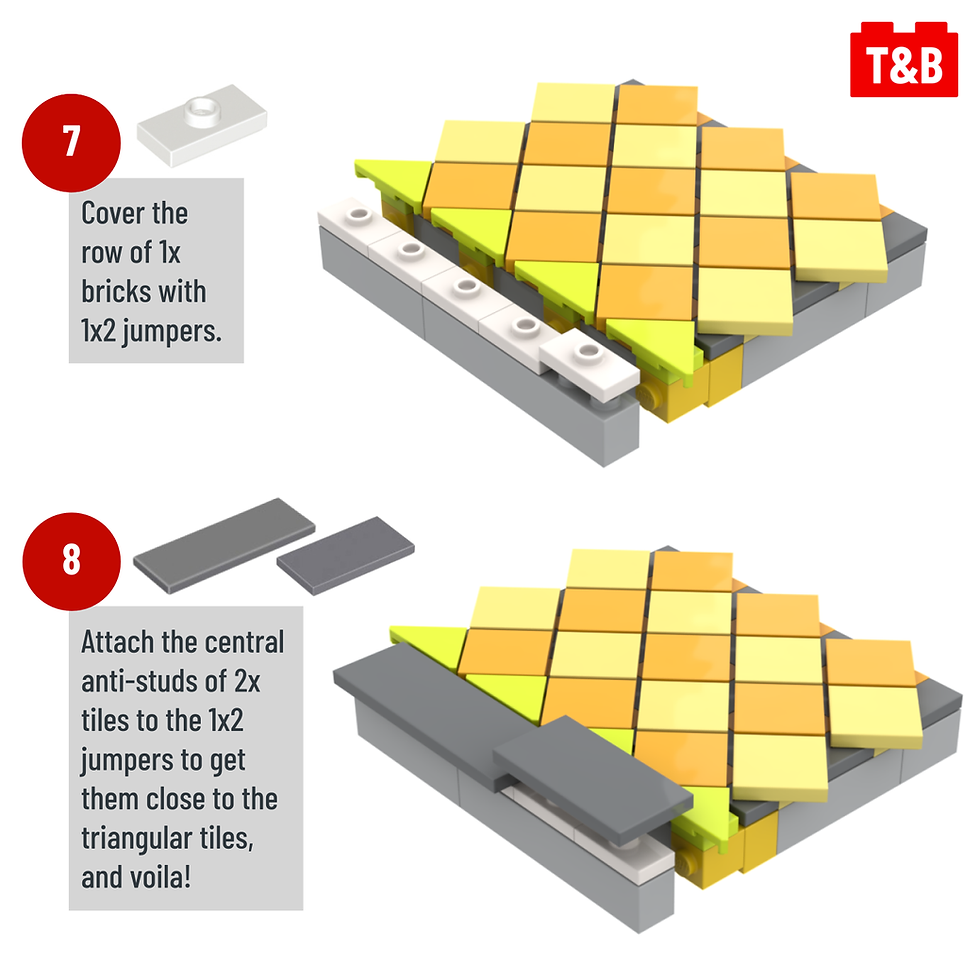
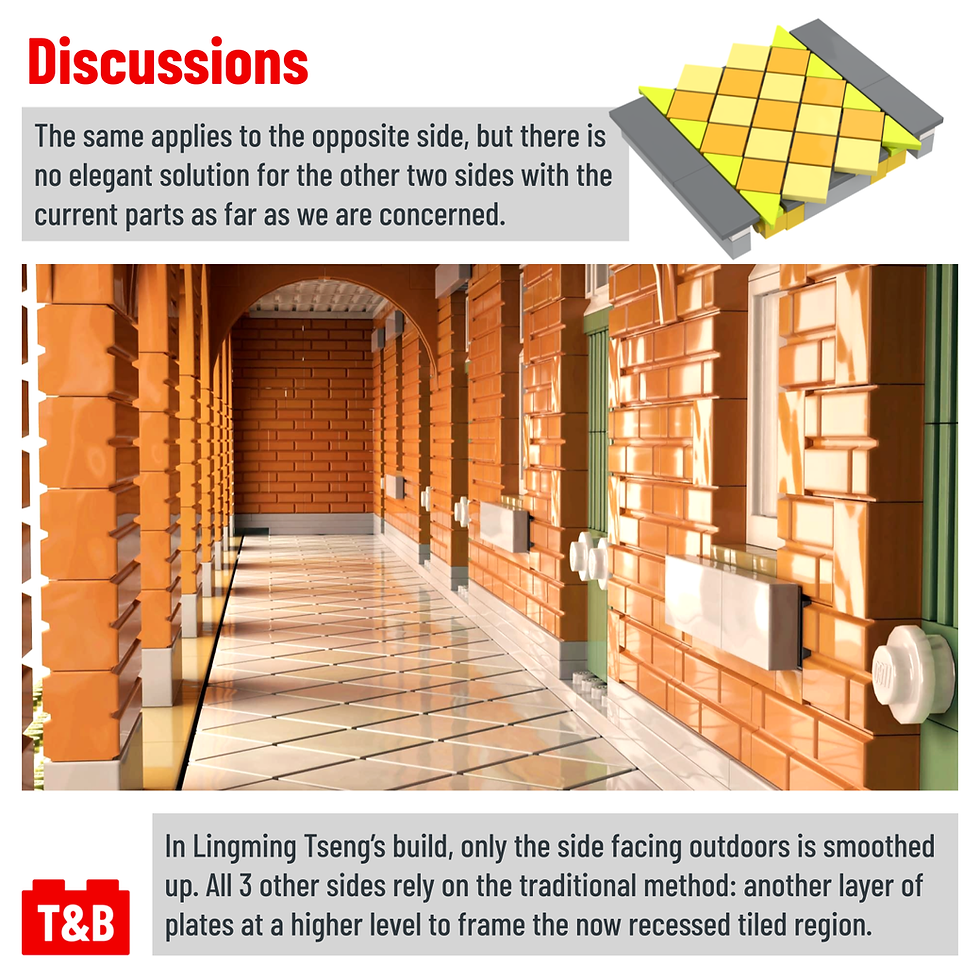
Old techniques can sometimes be improved by a single new element! Follow our step-by-step tutorial and the discussions afterward to see how to smooth out the edges of diagonally tiled regions.


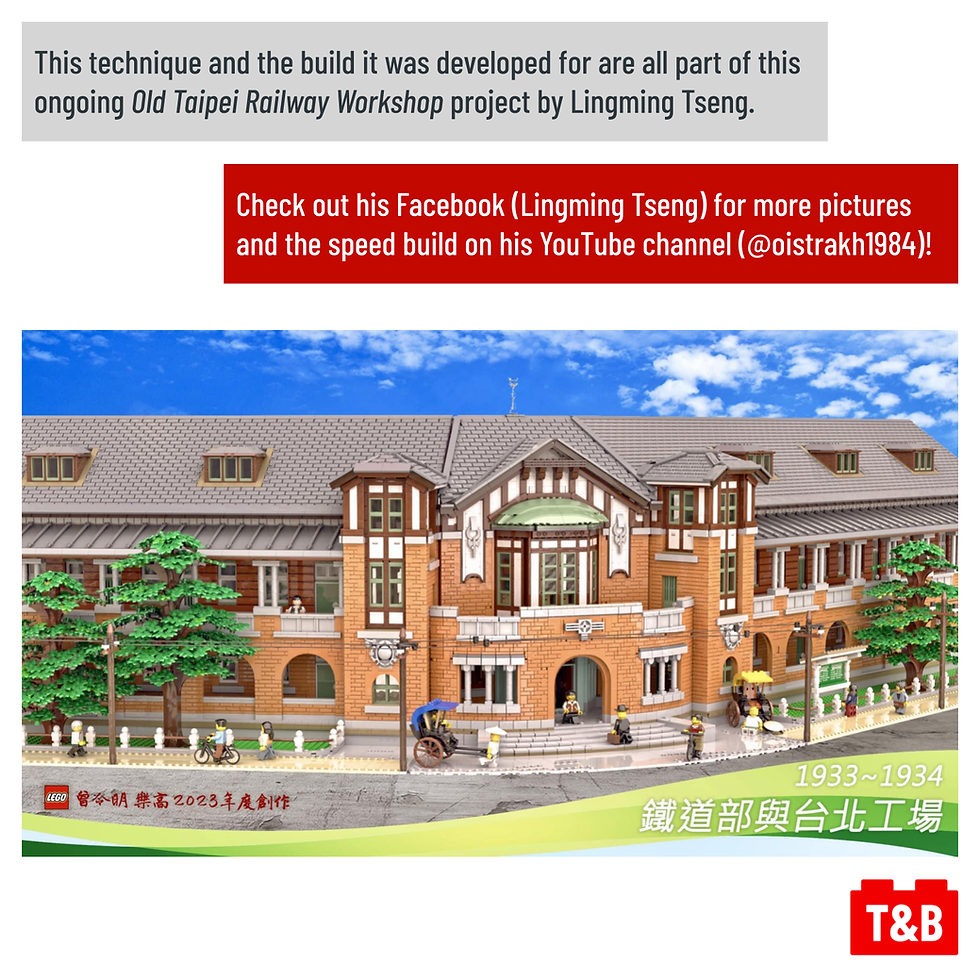
Visit Lingming’s Facebook and Youtube for more of the impressive Old Taipei Railway Workshop project: https://www.facebook.com/media/set/?vanity=lingming&set=a.10160427026458705
Nếu bạn là fan của game đổi thưởng, sanclub chắc chắn là cái tên không thể bỏ qua. Với giao diện dễ sử dụng, kho trò chơi phong phú và dịch vụ hỗ trợ 24/7, nền tảng này luôn mang đến những trải nghiệm thú vị và chuyên nghiệp cho người chơi.
Advertising agencies offer a range of services. Market research and analysis help understand consumer behavior, industry trends, and competition to create data-driven marketing strategies meta advertising solution. Branding services include logo design, tagline creation, and defining brand voice and identity to make businesses stand out.
Once again. Drift Boss